Wireless: Is It Really as Good as It Sounds?
Integrators need to educate customers better that ‘wireless’ audio does not mean ‘no new wires,’ and installing a cable-less system is not necessarily less labor intensive.
 Wireless has its place when used properly, but it doesn’t mean no new wires. It is obvious many custom manufacturers of multiroom audio systems are pinning their hopes for 2014 on new wireless audio products. Wireless is a wonderful solution; it eliminates the need to pre-wire a house and can be installed as a retrofit. Now that video can be transmitted around the home via wireless, audio transmission should be a breeze.
However, not wanting to be a wet rag, I would suggest caution. If anything sounds too good to be true, you can bet there is more to the story. When it comes to distributing audio around the home without cables, we should have a look at the practical implications more carefully.
Wireless is Not 100% Reliable
Wireless, of course is not new. My first foray into it was in the late 1960s with a wireless remote volume control. It was a fantastic idea—a little box was placed between the pre and power amplifiers so the level could be adjusted from your armchair. It worked well most of the time, but not all the time. On occasion it was slow to respond, which was quite irritating. But the real problem was when you pushed the “up” button, on occasions, it did not stop and then it would continue to increase the level unaided to full output, often destroying very expensive speakers.
Through the years wireless has greatly improved, but in a world hungry for convenience, for every improvement in wireless technology there has be a consequential demand to make it deliver more. For that reason it has never been perfect. Maybe 99 percent right at times but never 100 percent.
You may ask why is 99 percent not a good result? Those experienced in remote systems are well aware how unforgiving consumers are if they are not directly in front of a component. Now with IP-based solutions, we have upped the ante transmitting audio wirelessly as well as system control through the home. As good as we are getting with latency, the slightest drop out of signal can be very frustrating to most consumers.
‘Wireless’ Does Not Mean ‘No Wires’
As convenient as it is, a smart installer knows wireless can be fickle and when problems arise it can expose them to a lot of hassle and call backs, so hardwiring will always be their preference. To consumers, wireless solutions mean “no need to wire at all” to save costs and absolve them from need to employ an integrator or electrician or do any forward planning. The consumer needs to be better informed.
Wireless moves the amplifier from the central equipment cabinet into each individual room, which was one of the important parameters when we developed A-BUS. (Editor’s Note: A-BUS technology has the power supply located at the hub end where there is access to power. It is then sent down the Cat 5 cable to the amplifier located in the room with the speakers. Without the power supply, it is small enough to fit behind a single-gang wall plate or on the back of a speaker.)
Being from an audiophile background, long runs of speaker cable around the home have always been an anathema to me. If it is accepted, you should use good quality speaker cable to prevent signal losses to your speakers when they are just across the room from the amplifier. Running poor quality speaker cable (as our industry does) to the other end of a house must be wrong. So why do we do it?
Let’s look at why. Where do you put an amplifier in a bathroom? Even in a bedroom where you normally have a closet space available, generally homeowners don’t like electrical components hidden away in them. Putting them in ceilings sitting next to the speakers amongst the insulation material can be messy. Centrally located amplifiers in an equipment closet and nasty long speaker cable runs have been the norm.
If finding an amplifier location is hard, finding a convenient power point for it is even harder. The situation is no different to the plethora of wireless speakers coming on the market implying “no wires required.” Of course there are wires; each speaker has a thick power cord running out the back of it looking for a power point. In multiroom audio this can be very inconvenient as it introduces the need for a high-voltage installer (electrician) to be involved in the installation procedure adding complexity and expense to the installation. If the employment of an electrician is to be avoided you, have to contend most power points are located at floor level and most multiroom audio speakers are located in ceilings. In between there is a cabling job to be done, so wireless is not necessarily cableless!
Bluetooth Connectivity is in Demand
Wireless definitely has its place when used properly. Bluetooth in most instances simply replaces the need for a patch lead. It is designed to work within a room over a short distance, making it highly reliable. Now your phone has become your personal entertainment system, having a local Bluetooth wireless connection in each room is becoming a very important consumer feature.
So where is the wireless cost savings? First look at the additional cost of a power point per room and second at wiring additional IP points—a sensible installer wouldn’t risk a “wireless only” installation. Then look at the higher cost of amplification each with its own power supply and weigh these factors against cost of running cable.
I think we forget the origins of the custom market. It grew out of the consumer’s desire to eliminate messy wires and black boxes around the home. With our current rush to adopt new wireless technology, the industry and consumer appears to have lost sight of our most important goal; that is to provide “invisible home entertainment.”
By Andrew Goldfinch
http://www.cepro.com/article/wireless_is_it_really_as_good_as_it_sounds/K536
Custom Installation Services, LLC – First choice for low voltage wiring and home networking in Charlotte, NC and surrounding areas
Posted in Audio Systems, Automation, Blu-ray, Central Vac System, Flat Panel TV's, Home Theater, Home Theater Setup, IP Cameras, lighting control, Linksys, Low Voltage Contractors, Luxul, Media Rooms, Multi Room A/V, Netgear Routers, Network Setup, News, Outdoor Speakers, Structured Wiring, technology, Wireless Network
|
Tagged Booster, Bose, home network setup, home theater setup, lifestyle system, Linksys, luxul, Netgear, Structured Wiring, wilson cell booster, wireless router, wireless speakers
|
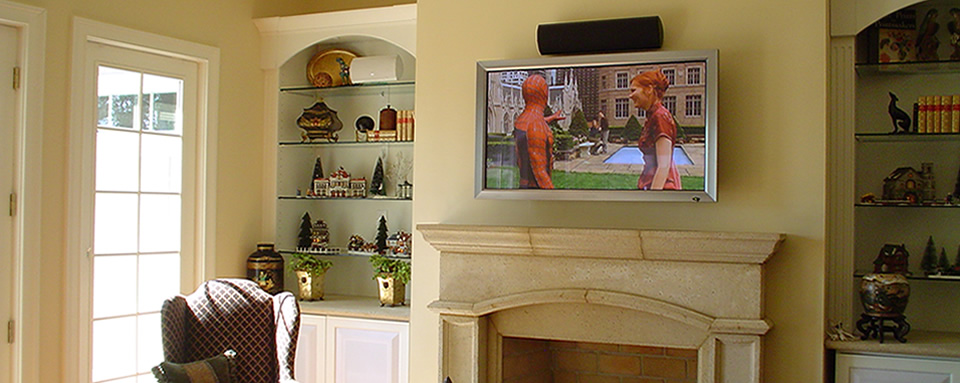
Time to Tune Up Your Home Theater?
Make your old system new again
Home theaters have been around for some time now. Sure, the screens have become bigger and the speakers more powerful. Throw in a media streamer or server, and the way a home theater looks and behaves today is a lot different than it did just five years ago. So, veteran owners of home theaters, is it time to update? Should you invest in new gear? Or, maybe there are some simple tweaks you can make that’ll have your home theater humming like it’s brand new.
We asked a few seasoned custom electronics professionals (CE pros) for their recommendations. Some of the suggestions you might be able to do yourself; for others you will probably need the help of a pro. Regardless, “A/V systems need maintenance just like anything else we use daily, like cars, HVAC systems and computers. There will always be maintenance needs and costs associated with your system,” says Jason Voorhees of Cantara Design, Costa Mesa, Calif., Many CE pros offer home theater tune-ups as part of maintenance package. Expect to spend between $125 to $300 for the service, which may include just a few updates or many, depending on the system specifics.

Dust off your equipment: Dust can cause home theater components to run at a higher operating temperature, potentially decreasing their lifespan. Any components that have accessible filters (projectors, media servers, PC, etc.), should be cleaned once a year.
Audio Tuning: If you originally tuned your system (or had a professional do it) right after taking your speakers out of their boxes, it’s almost a given that the elastic properties of your drivers have changed over time. As the drivers loosen up from use, the sound they produce can change. It is probably time to re-tune.
Settings: Assuming your home theater system is 1080p capable, make sure all of your devices are set to output at 1080p, include satellite and cable boxes, Apple TVs, etc.
Brightness: One thing that can decrease over time is the brightness of your video display, especially that of projectors. Every display has some built-in picture modes; these settings are often called Vivid, Dynamic, Movie, Standard, 3D, etc. You may find that by simply adjusting a picture mode that you suddenly have a better looking video display.
Update: If your system isn’t 1080p and HDMI, it should be. You’ll open your theater up to a world of high-def and streaming services.
Calibrate: refocus and recalibrate the projector; recalibrate the surround-sound system.
Firmware: Install and test new firmware updates for every part of your system. The updates may fix bugs or may make new features available.
Seats & Curtains: Clean and test all of the theater seating, and repair if necessary. If the theater has curtains, they should be cleaned also.
Batteries and Bulbs: If any components use rechargeable batteries (remote controls, power supplies, etc.), test them and replace if necessary. Replace dead light fixtures.
Clean the Screen: Use a tape-based lint roller on the black fabric frame (if you have a fixed screen). You’ll be amazed at how much dust this material attracts. For a fixed screen use a soft horse-hair brush to gently brush off the screen surface. If you have a roll-up screen, bugs like to fly into the roller and get embedded into the screen. Call the manufacturer to determine what kind of cleaning solution is best.
Test Tone: How do you know if a tweeter or a crossover is blown on one of your speakers if you don’t spend 20 minutes doing a simple test tone sweep on each speaker? Not sure if the tweeter is working? Put your hand over the tweeter and listen to the speaker. If the sound doesn’t change, you probably have a problem. Your listening tastes may change too, and by calibrating yearly for level, distance and speaker position (if your speakers are moveable), you’ll be able to tune-up according to your changing tastes.
Delete: Spend 10 minutes deleting channels you don’t watch from your DirecTV or cable TV on-screen guide.
Reboot: Reboot your DVR every 2 months. You might be surprised at how much faster it will operate.
New Additions: Many older home theaters have a set-top box, a DVD player and a local library of content on a media server, but may not have a streaming media player. It’s time to get an Apple TV, Roku or some other device that can stream content to your home theater. This might also involve reprogramming your remote and adding new cabling.

by Lisa Montgomery
http://www.electronichouse.com/article/time_to_tune_up_your_home_theater/D1/
Custom Installation Services, LLC – Your Home Theater Tune Up Specialists Charlotte, NC and surrounding areas
Posted in 3d movies, 3D TV, Audio Demos, Audio Systems, Automation, Blu-ray, Flat Panel TV's, Gaming Systems, HDMI Specs, Home Theater, i-Pad, IP Cameras, LED, Media Rooms, Multi Room A/V, Music and Movies, Outdoor Speakers, Panamax, Sports Bar, Structured Wiring, technology, Theater Seating
|
Anatomy of a Central Vacuum System: 5 Easy Pieces
What goes into a central vacuum system? We lay out the five basic pieces: power unit, piping, inlets, hoses and brushes and accessories.
Do you hate dirt and hate to vacuum? A central vacuum system may be just what you need. Instead of lugging a canister around the home, the heavy lifting is done by a power unit located some place like the garage, where it can barely be heard.
A central vacuum system can also be a healthier and greener choice, as it won’t emit dirt particles into the air, as do some other vacuum systems.
For consumers who are new to the category, we provide the foundations of a central vacuum system.

1. Power Unit
Drives the system and is usually mounted in the garage.
Bag vs. cyclonic (bagless) filtering: Bag-type systems require users to replace bags, but don’t require venting the system to the outdoors. Cyclonic units require no messy bags, but do need to be exhausted to the outdoors. Typical homes under 6,000 square feet can run off of a dedicated 20-amp, 120-volt circuit. Larger homes may require a larger, dedicated circuit. AirWatts typically indicate the power of the unit, but be cautious of using single high-air watt motors in larger home applications, as they may wear out too soon. Consider a unit with a utility valve on the tank for cleaning the cars and garage Typically code requires the wall between the garage and home to be penetrated with steel pipe. Check local building codes for safety requirements.
2. Piping
Provides suction from the power unit and delivers waste to the power unit.
2-inch special piping tested to specific standards. Cut the pipe with a miter box, chop saw, or tubing cutter. It must have a smooth, straight cut to reduce potential for debris getting stuck. Use wide sweeping turns at all locations after the inlet valve. For less friction loss, make jogs with 45-degree ells instead of 90-degree ells. Low-voltage wire follows along the outside of the pipe. Strap it to the pipe with zip ties or tape. Wire is run in series rather than home-run.

3. Inlets
Installed in the walls between piping and hoses.
Typically, one inlet covers 600 to 900 square feet of living space. Inlets are located at the same height as electrical outlets, but they can also fit in to the baseboards. Inlets are available as “air-only” or electrified. Electricity is required for traditional power brushes, but can still be provided with a separate cord for non-electrified (less expensive) outlets. Remember to place inlets near outdoor patios and porches. Plan for an inlet near the base of the stairs.
4. Hoses
Connect from the inlet to the vacuum cleaner.
Hoses normally come in 30-foot lengths, but 35-footers are available. Consider buying an additional hose and tool set for upstairs. A hose sock can protect baseboards and furniture. Designate a closet to hang the hose and tool set. Options are available for easy-to-tote spools and for hoses (up to 50 feet) that retract into walls.

5. Power Brushes, Accessories
Connect to hoses for cleaning everything from carpeting to pets.
Power brushes are the best central vac accessory for cleaning carpets and other flooring. Most brushes require electricity, but some lower-powered units can operate via air power. Brushes come in a variety of shapes and sizes for cleaning upholstery, staircases, cars, underneath furniture and more. Additional accessories can be used for cleaning tight spaces, ceiling fans, pets and more.
Grant Olewire of MD Manufacturing contributed to this article.
By CE Pro Editors
http://www.cepro.com/article/anatomy_of_central_vac_systems/T320
Custom Installation Services, LLC – First choice for low voltage wiring and central vac in Charlotte, NC and surrounding areas
Posted in 3D TV, Automation, Central Vac System, Flat Panel TV's, Home Theater, IP Cameras, LED, lighting control, Low Voltage Contractors, Lutron Radio Ra II, Media Rooms, Outdoor Speakers, Structured Wiring, technology
|
Tagged 3d theater in charlotte, Best Buy, boone, business audio video, cable, central vac dealers in charlotte nc, charlotte audio advice, charlotte green electronics company, charlotte hd installers, Charlotte Home Theater, charlotte home theater installation, Charlotte onkyo dealers, comcast, commercial a/v installation charlotte, corporate a/v installation, custom home builders in lake norman, dirt devil, geek squad in charlotte nc, HD installers in Charlotte nc, home theater wiring, innovative systems, Lake Norman, Low voltage contractors, low voltage wiring, Lutron RadioRa2, marantz dealers lake norman, multiroom audio, network, satellite, speakercraft dealers in charlotte nc, sports bar a/v installers, sports bars, sunbrite, surround sound, time warner, tv installation, tv installers charlotte audio video installers, TV recycling, zobo
|
|
|
|

